Give your images more "PUNCH"– Photoshop Tutorial
This tutorial will guide you through the process to add more punch to your images.
If you have an image that looks rather flat with not a lot of contrast the following steps
will help you get a more vibrant punchy image.
Please note: that all text and images on this site are copyright to Mark Dunn of "MRD Photography".
You may link to this page as long as accreditation is given. Under no circumstances should any of
the information be modified or copied without consent of the author.
1. (Connect your DSLR or compact camera to a pc to download your image)
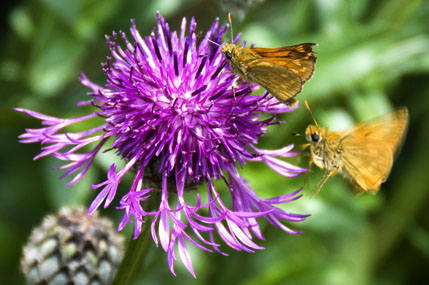
Load your start image into Photoshop, see sample below: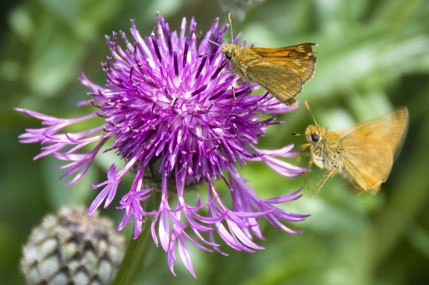
2. (Adjusts mid tone levels)
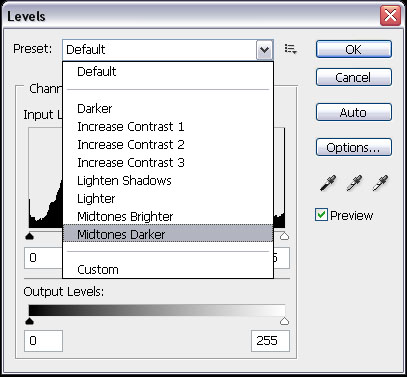
We start by going into Levels..This is found under the top menu [IMAGE] → [ADJUSTMENTS] → [LEVELS]
Once the Levels box is displayed, you will need to go to the "Preset" pull-down menu
and select "Midtones Darker", which will darken the midtones within your image.
See Levels (screenshot below & image revised below that).
3. (Tweak the brightness and contrast of your image)
Now we need to brighten the image a little:
This is found under in the top menu [IMAGE] → [ADJUSTMENTS] → [BRIGHTNESS/CONTRAST]
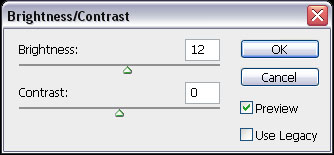
I have used the value of Brightness = 12, (you will need to adjust this value to suit your image).
You want to make sure that you do not "Blow out" the white parts of your image, as you
are only trying to add a little bit of brightness back into it.
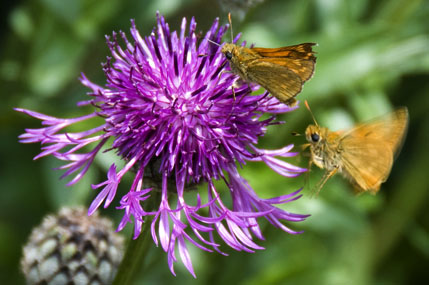
My image now looks like this:

4. (Correct over or under exposed image)
Then a quick tweak of “Exposure” and "Gamma Correction" to finally tweek the overall look of the image:
This is found under in the top menu [IMAGE] → [ADJUSTMENTS] → [EXPOSURE]
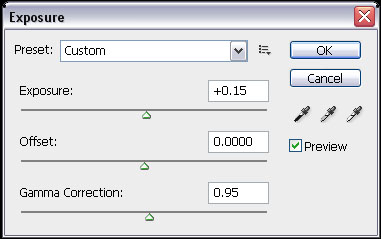
I have used the values of:
Exposure = +0.15
Gamma Correction = 0.95
You will need to adjust this value to suit your image and once again make sure that you
do not "Blow out" the white parts of your image.
My image now looks like this:
5. (Sharpen image to give crisp detail)
Now we can finish off with a little bit of "Unsharpen", to sharpen the image and bring out a bit more detail:
This is found under in the top menu [FILTER] → [SHARPEN] → [UNSHARPEN MASK]
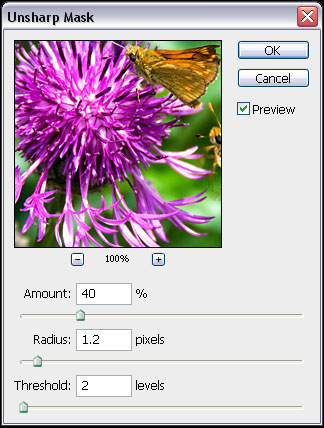
I have used the values of:
Amount = 40%
Adjust this to a higher percentage to bring out more detail, but dont over do it as otherwise
your image will look too over sharpened and not natural. Generally the larger the image (more pixels)
the higher you can push up the percentage.
(For this tutorial I have reduced the size of my image to use on this webpage, therefore I have had to
reduce the percentage to 40%, normally I would use a figure of around 75% for a fullsize image).
Radius: = 1.2
I generally keep this at 1.2 pixels
Threshold: = 2
I generally keep this at 2 levels

Now the final image should look more punchy and not so washed out and flat.
Below you can see the comparison between the End image (right hand image),
against the original Start Image (left hand image).
| Start Image | End Image |
|
|
![]()
Copyright MRD Photography - Mark Dunn