Reclaim Blown-Out Sky – Photoshop Tutorial
This tutorial will guide you through the process to reclaim a blown-out sky.
Please note: All text and images on this site are copyright to Mark Dunn of MRD Photography. You may link to this page as long as accreditation is given. Under no circumstances should any of the information be modified or copied without consent of the author.
1. Connect your DSLR or Compact Camera to a PC to Download Your Image
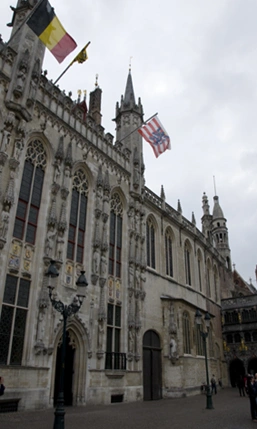
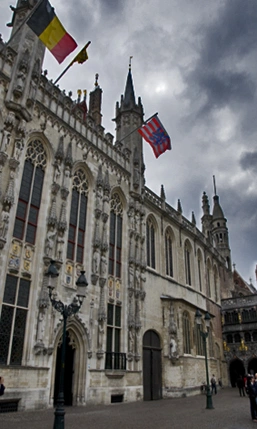
Load your start image into Photoshop, which has the blown-out sky. See sample below:
2. Adjust the Shadow and Highlight Parts of Your Image
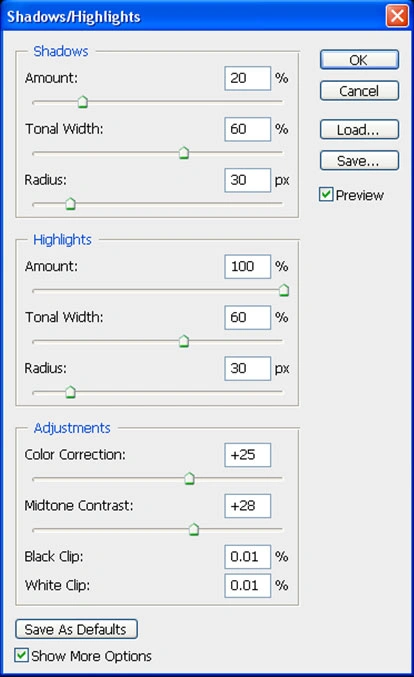
Now we need to go into Shadow and Highlight. This is found under the top menu [IMAGE] → [ADJUSTMENTS] → [SHADOWS/HIGHLIGHTS]. You will need to tweak these settings to suit your image. Below are the settings and values I have used for my image.
[SHADOWS section]
Amount = 20%
(The higher the value, the lighter the dark "shadow areas" of the image will become. Moving the slider up to 20% lightens the buildings and the pavement.)
Tonal Width = 60%
(The higher the value, the broader the tones within the shadow areas. I have set this to 60%.)
Radius = 30px
(This value affects the radial area of shadow detail. I have left this at 30px.)
[HIGHLIGHTS section]
Amount = 100%
(The higher the value, the darker the lighter areas of the image will become. Moving the slider up to 100% darkens the blown-out sky and pulls back definition into the clouds.)
Tonal Width = 60%
(The higher the value, the broader the tones. I have set this to 60% as this worked best for the sky and buildings.)
Radius = 30px
(This value affects the radial area of highlight detail. I have left this at 30px. Watch out for halos occurring around outlines, i.e., where the buildings and sky meet. Adjust this value to give the maximum detail in the sky while avoiding obvious halos.)
[ADJUSTMENTS section]
Colour Correction = +25
(Adjusts the color within the changed part of the image. I have used +25 to saturate the image a little bit as it was a little flat.)
Midtone Contrast = +28
(Adjusts the midtone contrast of the image. I have used +28 to darken the image a little.)
NOTE: The values I have chosen suit the image I have used for this tutorial. You will need to experiment with various values to see which work best for your image.
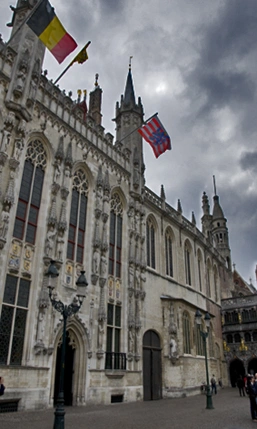
After applying the above values within the "Shadows and Highlights" tool, my image now looks like this:
3. Apply Linear Contrast with Curves
Now we need to do a couple of "Linear Contrast" curves. This is found under the top menu [IMAGE] → [ADJUSTMENTS] → [CURVES].
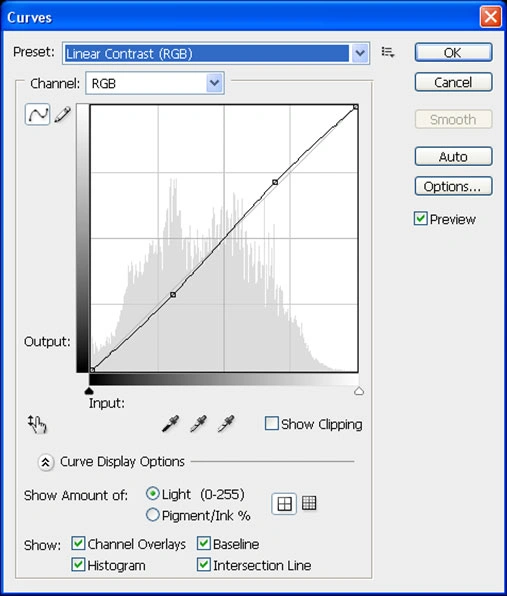
Now the image will look like this:
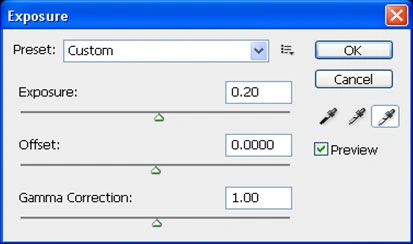
4. Correct Over or Under Exposed Image
Then a quick tweak of "Exposure" to brighten the image a bit. This is found under the top menu [IMAGE] → [ADJUSTMENTS] → [EXPOSURE].
This will now give us the final end image (right-hand image), compared against the original start image (left-hand image).
| Start Image | End Image |
|
 |
Copyright MRD Photography - Mark Dunn